|
Establish Orientation (Primary Datum)
 At this time you should slide the access covers back on
the stylus rack bays. Make sure they are locked back exposing the bays. At this time you should slide the access covers back on
the stylus rack bays. Make sure they are locked back exposing the bays.
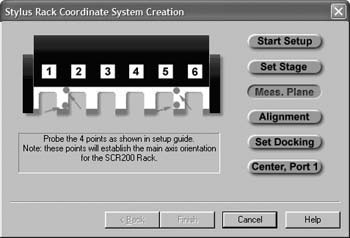
A prompt will appear asking for the probing direction for the four
points required for establishing the orientation of the rack.
Once you have selected the probe direction, the setup screen will flash in red
the positions you should capture.
Probe each location until all four data points have been captured.
When the orientation has been established,
the setup will advance to
step 8 automatically.
Return to Step 6, advance to Step 8.
Related Procedures:
Stylus Manager,
Choosing a Stylus,
Stylus db Manager,
Stylus Edit Control,
Stylus Rack Setup
|


