|
Summary
Labeling an individual stylus is helpful in identifying it's unique characteristics. In
Geomet, when a new stylus is qualified, and by default, is given the next available tip
number. This is not very helpful in describing the characteristic of the stylus. For
example, the tip may be the "left tip" on a stylus cluster.
Procedure
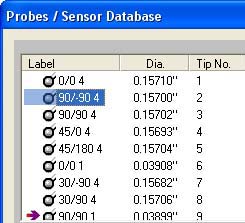
To attach a label on a single stylus, two methods can be employed. The first involves
the standard Windows interface where you highlight the desired tip by left-clicking once
on the stylus under the Label column header, see figure 1. Then left-click
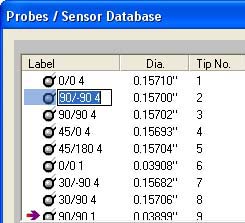
on the stylus again, and when Windows acknowledges the second left-click, an edit
box surrounds the current label and you can type directly into the Stylus Manager list,
see
figure 2.
|
 |
 |
|
figure 1, Highlighted Stylus |
figure 2, Active Edit in Progress |

Should Windows not provide the edit process, you can activate the label
edit tool by selecting the stylus as described above and press the < l >,
lowercase L,
key on the keyboard. Another method to start the edit process is to
highlight the stylus and press the <End Label> button. This will start the edit process for that selected stylus. To
complete the labeling process, press the <Enter> key on the keyboard, or highlight
another stylus.
Related Procedures:
Stylus Manager,
Qualifying a Stylus,
Re-Qualifying a Stylus,
Choosing a Stylus,
Deleting a Stylus,
Stylus db Manager, Measuring with Multiple Styli
|


