|
Introduction
Geomet provides a self installation program that handles the installation, upgrade and
repair tools for your system. When installing Geomet Version 6.65, you are first required to
install
DirectX, Microsoft's Multi-Media enhancement to Windows. Geomet now
utilizes some multi-media tools such as sounds and picture display.
NOTE: These instructions are for full installations, not for Interim Releases. To
install an Interim Release look
here.
Installation Programs and Procedures
Installation of Geomet Related Programs
CMM Interface Selection
Geomet self configures to many computer and interface versions of old and
new Geomet systems. This is accomplished through the use of
a CMM interface software module, commonly referred to as a Table Controller. When running
Geomet for the first time, Geomet will prompt you to select a interface,
see Interface Types. Once this has been established,
Geomet will continue loading and records the interface selection for future use.
When updating Geomet, you are first prompted to un-install previous versions. The
process of un-installing does not remove the reference to the Table Controller. When starting
the upgraded Geomet you will not be prompted to select the interface.
Limitations
The DirectX enhancement to Windows works with Windows 98, Windows XP and Windows 2000
version of Geomet.
NOTE: Windows 95 is no longer supported for Geomet
version 6.00.002.xxx and newer. If your Geomet system is installed on a Windows 95,
it is suggested that you upgrade your operating system. You can obtain Windows upgrade
packages directly from Microsoft and many local vendors in your area. Geomet Version
6.00.001 and below will still be supported by Windows 95.
To upgrade your current Geomet installation always start by un-installing all existing
Geomet programs. To accomplish this, go to your Control Panel tools provided in Windows.
In figure 1, we show an example of the Control Panel on a Windows XP system.
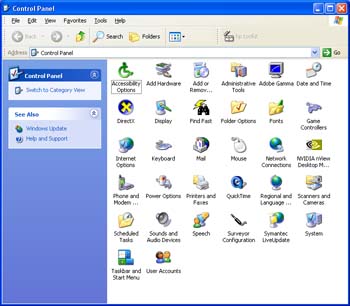 |
| figure 1, Windows XP Control Panel |
Locate the program Add or Remove Programs and start the
application by double clicking. A listing of all programs installed that Windows has
un-install options for will be listed. Locate the Geomet listing, see figure 2,
and select the <Remove> button.
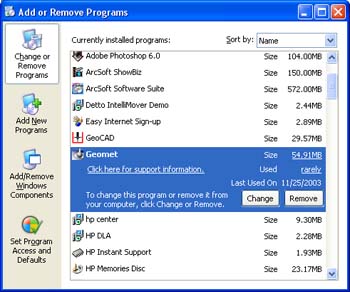 |
| figure 2, Selecting Geomet to Un-Install |
You will be asked to confirm that Geomet should be removed. Answer by accepting
<Yes> and Geomet and all associated program files will be removed.
The Un-Install process does not remove any inspection programs or Windows registry files
associated with Geomet. Therefore, the updated Geomet will retain the preference settings
and version levels previously active. We recommend that you always make a backup copy of
your part programs as a normal operating procedure.
To install Geomet, place the CD in your system's drive. This CD does not contain an auto
run option and you should open and view the contents of the CD with Windows Explorer or
similar method.
On the root directory, there are several folders and text files, see figure 3.
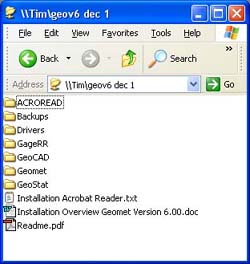 |
| figure 3, CD contents |
The installation starts with a quick review of the Readme.pdf latest
instructions. Should your system currently not have Adobe Acrobat Reader, please follow
these instructions.
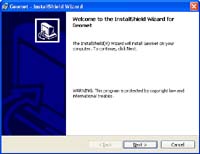
To start the Geomet installation, open the folder Geomet and double
click on the file setup.exe. The setup routine will launch and guide you
through the steps required.
Step 1 - Welcome to the Installer
This first step is the welcome screen for the installer, press <Next> to
proceed.
|
 |
| |
|
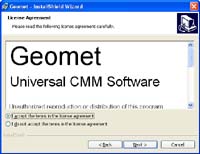
Step 2 - License Agreement
This step requires that have read and agreed to the terms and condition
with regard to using Geomet.
|
 |
| |
|
Step 3 - Customer Information
Update with your name and company.
|
 |
| |
|
Step 4 - Select Installation Type
Choose Complete in install Geomet and all associated
program and support files.
NOTE: Should you select Custom, the following screen will direct you
to choose which portion of Geomet to install. You choices are; the Geomet Program, Basic
Help Files, and complete on line help files.
|
 |
| |
|
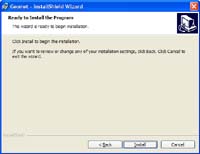
Step 5 - Confirm and Proceed
Press:
<Install> to proceed with the installation.
<Back> for previous screen.
<Cancel> to abort. |
 |
Once completed, the installer will notify you of the success of the installation
process. Should any errors occur, you will be notified. The most common error noted has
been leaving Geomet active while attempting to upgrade. This will cause an error and the
installation process will fail. Please ensure all programs are closed before performing
the installation.
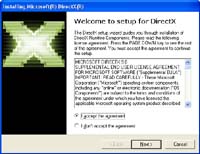
Geomet requires that DirectX support is installed in your Windows operating system.
DirextX is a multi media extension to Windows 98, Windows XP and Windows 2000. To install
DirectX locate the folder Drivers and then DirectX9 off
the Geomet Installation CD. Inside the DirectX9 folder, launch the program
dxsetup.exe.
To obtain the latest changes, download directly from
Microsoft, please follow these
instructions.
Step - 1 License Agreement
Choose "I Accept....." and select the <Next> button.
|
 |
| |
|
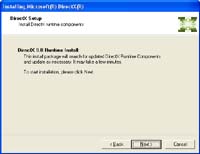
Step - 2 Commence Installation
This screen is the final step before installation begins. This dialog asks that you all
have all currently running programs shut down. Press <Next> to perform the
installation.
|
 |
Once the installation of the necessary files are completed, you are required to restart
your system to complete the installation process.
The Geomet On Line Help files are created in the Adobe pdf (Portable Document Format).
To view these files, it is required that Adobe Acrobat Reader is installed on your system.
To install the Reader, open the Geomet Installation CD and navigate to the folder
ACROREAD,
then open Installers. The installation program is named
AdbeRdr60_enu_full.EXE.
Launch this program and follow the installation instructions.
You can also install directly from the Adobe through
this link:

Once the program has been installed, launch the program and follow the instruction on
using the Reader. Once you answer the questions, the Reader will now be ready for use by
Geomet and other programs.
The Helmel designed ProCounter II CMM Interface requires installing device drivers to
operate correctly. The ProCounter II is designed to be recognized by the computer when it
is plugged into the USB port. NOTE: when performing an upgrade to an existing installation
of Geomet, the drivers will be retained and the installation of the ProCounter II drivers
will not be necessary.
When the computer identifies that a new USB device has been plugged in for the first
time, the Device Driver Wizard will start to assist you in installing the drivers.
Step 1 - Identifying a New Device
The first page of the Wizard acknowledges that a new USB device has been plugged in.
The Wizard should find the device and show the name Helmel ProCounter Interface.
Select <Next> to begin.
Step 2 - Specify Driver Location
On this page you will select a location which the Wizard will look into to locate the
correct driver. Insert the Geomet Installation CD and wait until the CD spins up. Place a
check next to Specify a location. You can type in the location or use the
<Browse> feature. To type in the location, enter D:\Drivers\ProCounterII
and press <Next>. NOTE: substitute the correct CD drive letter if it is not
D:.
Step 3 - Installing the Driver
The Wizard will now install and register the driver for the ProCounter II interface.
Download files here.
Geomet requires that a separate driver be installed on Windows XP and Windows 2000
system. This driver is for security and is not part of the normal Geomet Installer. If you
are upgrading Geomet, this step is not required.
Step 1- Locate the Sentinel Installer
The setup program can be found on the Geomet Installation CD. Open the folder
Driver,
then open the folder SPRO. Locate launch the program
SETUPX86.EXE.
Step 2 - Start the Installer.
When SETUPX86.EXE is launched, a small dialog will show with a drop down menu
Functions.
Select Install Sentinel Driver from the functions available. You will be
prompted with a file location tool which you should accept the default path and press
<Ok>. The installer will update your XP or 2000 system with the Sentinel driver. You
will be prompted to restart your system to complete the installation process.
Helmel Technical Phone Support: (716) 297-8644
|


