|
Introduction
Series 1 and 2 Helmel Joysticks, require calibration
through the Windows Control Panel. If you are not sure of which Series
Joystick you have,
check here.
Windows recognizes the Helmel CMM Joystick as a standard 5 button USB gaming device.
When you plug the Helmel Joystick in for first time, Windows will acknowledge it has
identified new hardware and if required will install the driver.
Verifying Joystick Installation
To launch the Windows Device Manager, locate your Windows Control Panel (on XP, Start
Menu→Control Panel) and locate "System". The System Properties tabbed
dialog appears which you would choose the "Hardware" tab. Next select the
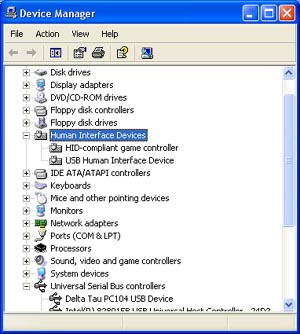
<Device Manager> button and the Device Manager tool appears, see figure 1.
 |
|
figure 1, Windows Device Manager |
The installation of the Helmel Joystick will be found under "Human Interface
Devices" as shown in figure 1. Should the Device Manager indicate there is a problem
with the installation, a "?" will appear next to the suspect device. If this
happens try moving the USB cable to another port on you computer.
Calibrate the Joysticks
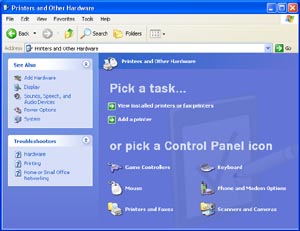
To calibrate the joystick movements, use the Windows Control Panel to locate "Game
Controllers, see figure 2.
 |
 |
| figure 2, Control Panel |
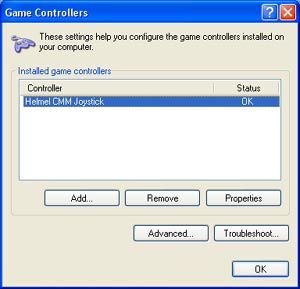
figure 3, Game Controllers |
Under Game Controllers an entry for the Helmel CMM Joystick is noted, see figure 3.
Select <Properties>, see figure 4.
 |
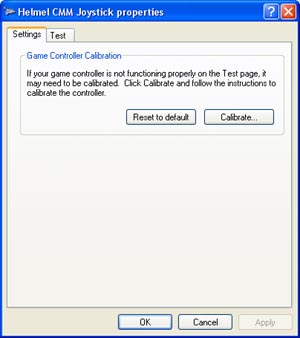 |
| figure 4, joystick Properties |
figure 5, Game Controller Calibration |
To calibrate start by selecting <Settings> from the property page, see figure
5. Select <Calibrate>, a welcome page is displayed, select <Next>. The
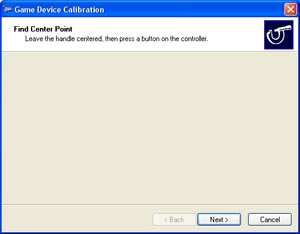
following page prompts you to leave the joysticks in the center location and press any
button on the joystick, see figure 6.
 |
 |
| figure 6, Start Calibration |
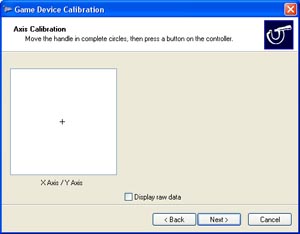
figure 7, perform Calibration |
When the Calibration Wizard acknowledges the button press, the next page will be
displayed. This page prompts the operator to rotate the XY axis joystick in complete
circles at the full extent, see figure 7. After a moving the XY joystick in
complete circles, release the joystick and press any button. The Calibration Wizard will
proceed to calibrate the Z axis in a similar process followed by calibrating the R axis.
Follow all prompts until the Calibration Wizard has completed.
You will be returned to the Joystick Properties page where you should press the
<Apply> button to save the calibration results.
|


