|
Command Activation
| |
Construct→Construct an
Offset Point |
|
| Keyboard |
Main Menu |
Toolbar |
Introduction
An Offset Point is a constructed point to an
existing measured or constructed 1D/2D or 3D Point. The resulting Point
can be used in constructions such as creating a plane to be used as the
orient from three target datum points where one target datum has an offset
distance.
Creating an Offset Point
To build an Offset Point, start by first
identifying in your part inspection one measured or constructed 1D/2D or
3D Point. Highlight the Point and choose from the main drop down
menus [Construct→Construct an Offset Point].
|
|
|
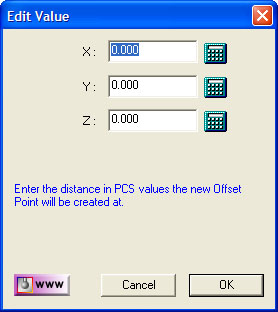
figure 1,
Offset Point Data Entry |
Should Geomet not be able to identify the
highlighted feature as a compatible Point, or more than one feature is
selected, Geomet will display a warning. Geomet also validates that the
highlighted Point is in the current Part Coordinate System.
Entering Nominal Offset Data
Enter to required XYZ nominal offset values. This
can be a combination of 1, 2 or three axes of change. Upon acceptance of
the nominal offset values, Geomet will create a new 3D Point.
Special Considerations
If the selected point is reported as a 1D Point, you
can create a matching 1D Point by entering only an offset value in the
reported direction. For example; highlight a -Z 1D Point feature and
activate the Offset Point Tool. Enter a offset value only against the Z
component, leaving X and Y at 0.00.
Geomet will then prompt you to:
1) Create a new -Z 1D Point
2) Create a new 3D Point
Creating a new 1D Point is helpful when constructing
features with similar 1D Points. Such as building a plane using 3 measured
-Z 1D Points and 1 -Z 1D Point that has been offset from a measured point.
|


